Let’s assume that you have some .docx or .xlsx file, and you need to save a copy to Dropbox. There are mainly two different methods you can follow. First, you can save the file in your local storage, sign in to your Dropbox account in a browser and then upload the file. Second, you can connect Dropbox to Microsoft Word or Excel for the iPad and save the file directly. If you have only one or two files, the first method seems okay. The problem may begin if you have twenty or thirty files, and you need to upload them at different times. The simple solution is to add Dropbox to the Word or Excel app and get your job done faster. Although the process is the same for both apps, this article contains Microsoft Word’s screenshots only. Dropbox should be added to the list in all Microsoft apps (Word, Excel, PowerPoint, etc.) once you add it to one app. If you cannot find the same across all apps, you need to follow these steps again for the second or third app. This process explains how you can add Dropbox to the “locations” list in Microsoft Office apps so that you can start saving files directly.
How to save Microsoft Office files to Dropbox on iPad
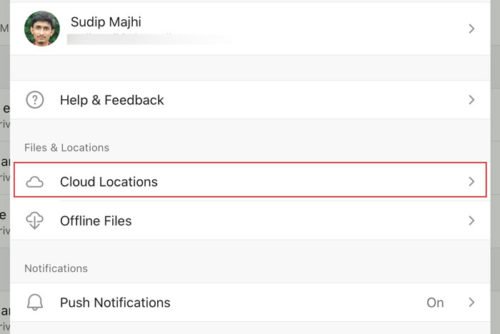
To save Microsoft Office files to Dropbox on the iPad, follow these steps- To get started, open the Microsoft Word (or any other Office app), and tap on the Settings button. It should be visible on the welcome screen. After that, select the Cloud Locations button under Files & Locations.
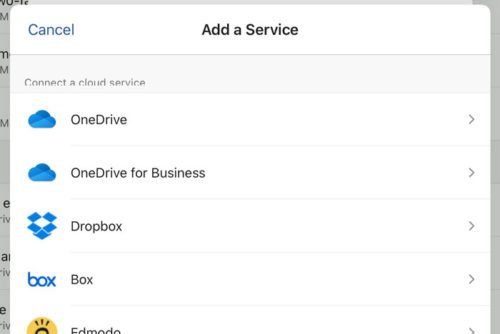
Tap on the Add a Locations button and select Dropbox from the list.
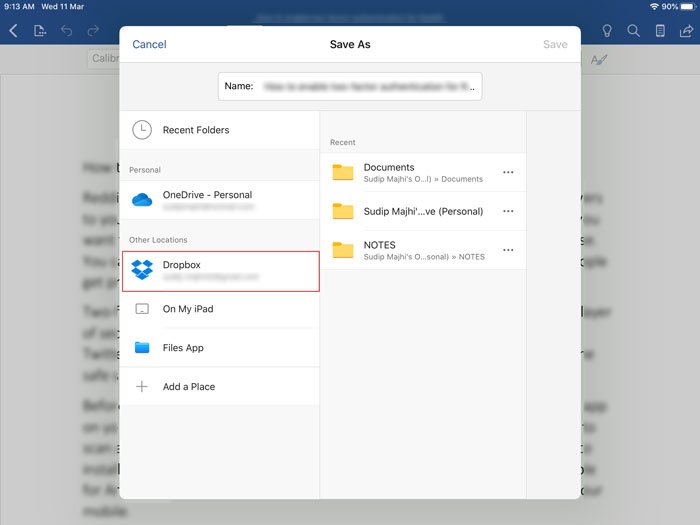
After that, you need to enter your Dropbox account credentials to allow Microsoft Word to access your storage to save files. If you do it successfully, you can find your Dropbox account on the Cloud Locations window. Now, go back and open a document that you want to save to Dropbox, and tap on the File button. You should see this button at the top-left corner. After expanding the menu, select Save a Copy option.
Here you can find Dropbox on your screen. You need to choose it from Other Locations section, select a directory where you want to save the file, and tap on the Save button.
Your file should be saved almost immediately.
Remove or unlink Dropbox account from Microsoft Office apps for iPad
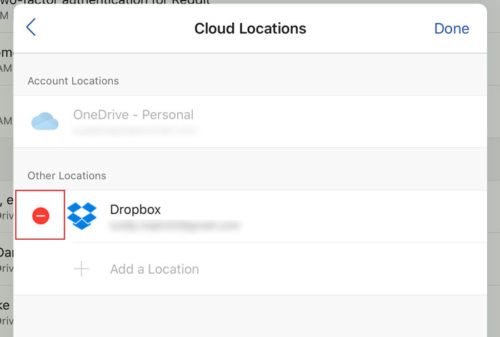
If Dropbox is no longer required and you wish to remove it from the list, you can follow these following steps. At first, open the Microsoft Word and go to Settings. After that, tap on the Cloud Locations option to find all the cloud storage that you added. Once you see the Dropbox on the list, tap the Edit and Delete buttons, respectively.
Following that, select Remove option and do it again on the confirmation window as well. Now, Dropbox should be unlinked from your Microsoft Office apps. That’s all!